Getting the perfect stainless steel TIG welds may require some practice, but you can set yourself up for success with the right products and some essential knowledge about the process. Start by selecting the correct welding rod for your material thickness and composition, and once you have the right supplies for the job, you can begin perfecting your application by managing your speed, and purging the backside of your welds. Let’s review these steps in more detail.
-
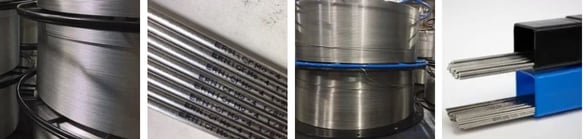
 Choose the Right Filler Wire: Central Wire offers 25 different configurations of Gen4 stainless steel welding wire, so it is essential to pick the correct product for your application. In general, you should consider rod size and material, and match them to the kind of stainless steel you are welding. Here are two guidelines:
The thicker the welding rod, the more heat is required to melt it, so the diameter of the filler metal should be thinner than your base metal. Your goal is to use a wire thin enough to apply a smooth bead that combats lumps, but still be thick enough to build up and control.
The filler metal and base metal should also be mechanically and chemically compatible to ensure strong welds and longevity. While there is some room for variation in your selection, base metals are traditionally specified for use with one filler metal. 316L base metal, for an example, will call for 316L filler metal, while 304 base metal will call for 308L filler metal. In short, the strength of your welds must meet or exceed the strength of your base metal to prevent cracking, snapping, or separation due to poor bonding. Choosing a compatible filler helps safeguard that durability.
- Manage the Puddle: Stainless steel is not very thermally conductive which means it builds heat very quickly. If not properly controlled, that excess heat may ruin the appearance of your welds or warp your project. To combat this, it is important to move quickly after establishing a puddle, and ideally only linger for about one second to prevent one area from becoming too hot. It may feel challenging to keep pace, but you can help control the quality of your welds by setting your welder to 1 amp per 0.001 inch of material thickness, and improve the accuracy of your application by practicing dry-runs to become comfortable with the movement.
- Back Purge Your Project: The backside of your project is just as important as the front side, which is why back purging is an essential part of the stainless steel welding process. There are many ways to pursue this process, from buying kits to making your own setup with foil, but the premise is simple; your goal is to create an atmosphere around the backside of your project that shields against air, and feeds argon gas to the underside of the welds. Oxidation can occur on the underside of your project when the molten stainless steel reacts with hot air, and this oxidation will leave a rough, granular surface behind. Not only is this surface unsightly, but it is also hazardous to the structural integrity of the weld, leaving it susceptible to cracking and rust. Back purging with a constant blanket of argon will combat these issues, and help form smoother, stronger joints.
For help selecting the right stainless steel welding wire for your application, visit the welding wire page on our website, or download our new Gen4 Welding Wire Catalog at https://centralwire.com/products/welding-wire/